Call Us Today: 419-549-8200
Call Us Today: 419-549-8200

Roll over or click to zoom in
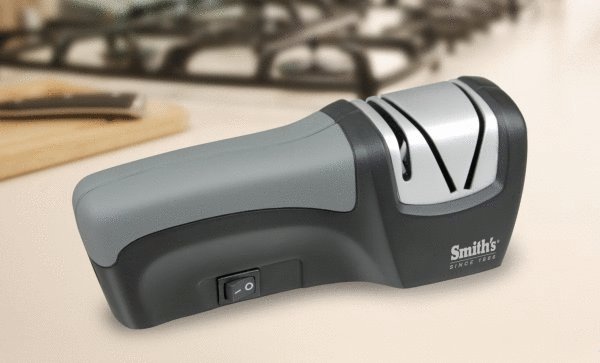
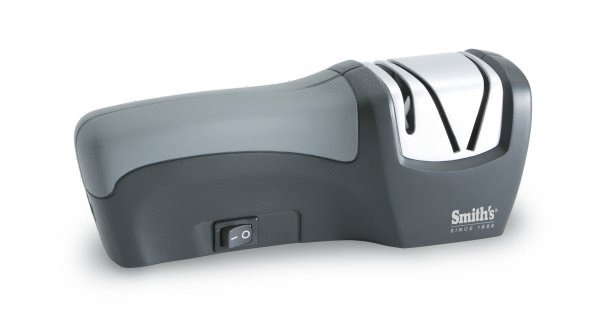
Smith's, the leader in innovative sharpening technology, is proud to offer an electric knife sharpener that incorporates both manual and mechanical sharpening elements. This unique combination provides a broad capability to easily sharpen dull blades and maintain razor sharp edges.
The sharpening wheels on your Edge Pro Compact Electric Knife Sharpener are made from bonded synthetics. The synthetics used are selected for their ability to guarantee longer wheel life, uniform cutting, and minimum heat build up, so that de-tempering of your blade does not occur. our wheels are manufactured according to strict tolerances in order to ensure the same high quality on each and every wheel that we make.
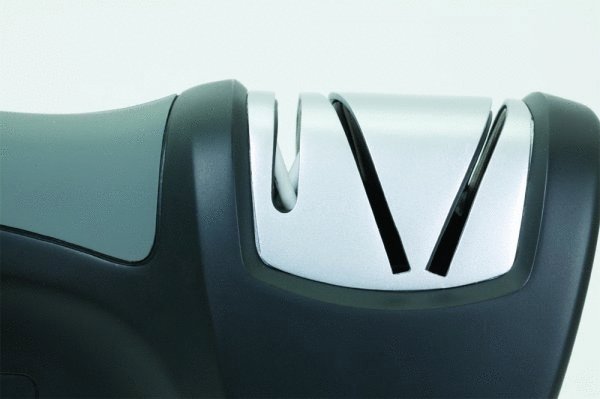
The crossed ceramic rods put the final finished edge on your blade. Crossed ceramic rods create a fixed sharpening angle that lightly hones both sides of your blade at the same time; thus, putting a polished, razor-sharp cutting edge on your knife. Also, the crossed ceramic rods are excellent for giving already sharp knives a a quick touch-up before use. Just a few, quick pulls through the sharpening slot is all it takes. Smith's recommends always using the ceramic rods for final edge honing after you sharpen using the synthetic wheels. Again, just a few pulls through the sharpening slot is all it takes.
Product Features
Features:
Product Instructions
Electric Sharpening Instructions:
Caution: Always sharpen your knife blade from the heel to the tip of the blade. Never insert the tip of the knife blade into the blade guide first or push your knife blade through the sharpening slot. This could damage the knife sharpener and/or your knife. Due to some handle designs, you may not be able to sharpen the entire length of the blade using the electric sharpening wheel. We recommend using the manual sharpening slots in these limited cases.
Clean all food or dirt off your blade. Never sharpen a dirty knife blade as this could cause the sharpener to malfunction or damage the sharpening wheel.
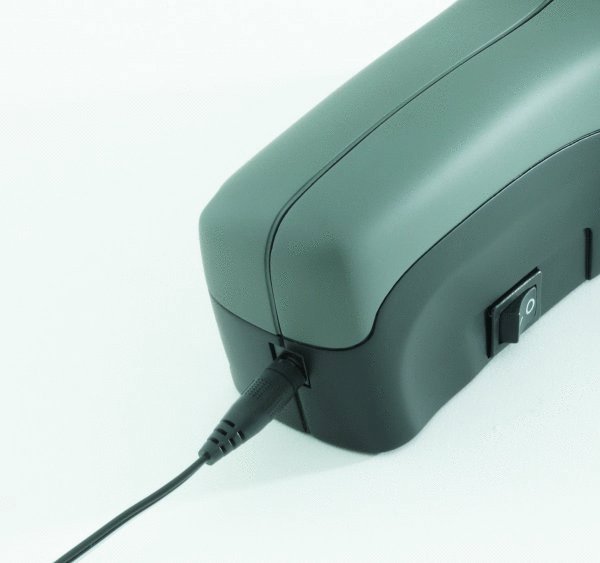
Insert the plug on the end of the power cord into a standard 120 volt electrical outlet. Connect the other end of the power cord into the end of the sharpener.
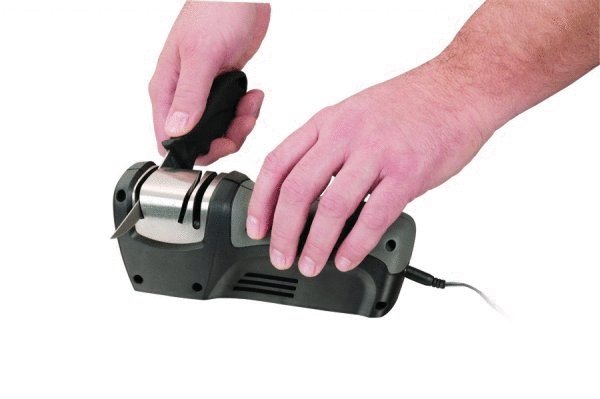
Place the unit on a flat, sturdy surface and turn the unit ON by pressing the vertical ON/OFF switch. you will notice two sharpening slots for electric sharpening, one for each side of your blade. In order to get the best results and to reduce excessive wheel wear, it is important that you do the same number of strokes on each side of your blade. Select the sharpening slot you would like to use first.
Hold the knife securely by the handle as you would in normal usage and position the heel of the blade over the selected sharpening slot. While holding the blade parallel to the table, lower the heel of the blade until it contacts the synthetic sharpening wheel. As soon as contact is made and you hear the distinctive grinding sound, pull the blade at a consistent speed though the sharpening slot using light, downward pressure. To sharpen the tip of the blade, lift up on the knife handle slightly as the curved portion of the blade is drawn through the blade guides.
Continue alternating passes between the two slots at the recommended speed.
Manual Sharpening Instructions:
Use the manual finishing slot to complete the sharpening process by removing any burrs left on your blade from the sharpening wheel and hone both side of your blade.
Hold the blade parallel to the table and center the heel of the blade in the bottom of the crossed ceramic rods.
Starting at the heel of the blade, pull the blade through the crossed ceramic rods while applying light, downward pressure (never back and forth). Remember to lift at the end of the stroke to sharpen the tip of your blade.
Repeat this process until your blade is razor sharp. Usually 3 or 4 strokes is all it takes.
Care:
